phpListの初期設定からテストメール送信まで#2
前回はphpListのインストールを行いました。
今回は初期設定からテストメール送信までを行います。
目次
テストモードの解除
まずはテストモードを解除し、メールの送信ができるようにします。
lists/config/config.php を編集します。
[text]
# if test is true (not 0) it will not actually send ANY messages, but display what it would have sent
# this is here, to make sure you edited the config file and mails are not sent "accidentally"
# on unmanaged systems
define ("TEST",0←ここをゼロにする);
[/text]
バウンスメールの送信先を指定する
[text]
# Message envelope.
#
# This is the address that most bounces will be delivered to
# Your should make this an address that no PERSON reads
# but a mailbox that phpList can empty every so often, to process the bounces
$message_envelope = ‘バウンスメールの送信先メールアドレス’;
# Handling bounces. Check README.bounces for more info
# This can be ‘pop’ or ‘mbox’
$bounce_protocol = ‘pop’;
# set this to 0, if you set up a cron to download bounces regularly by using the
# commandline option. If this is 0, users cannot run the page from the web
# frontend. Read README.commandline to find out how to set it up on the
# commandline
define ("MANUALLY_PROCESS_BOUNCES",1);
# when the protocol is pop, specify these three
$bounce_mailbox_host = ‘popサーバー’;
$bounce_mailbox_user = ‘ユーザー名’;
$bounce_mailbox_password = ‘パスワード’;
[/text]
フッターの編集
上部メニューより、[Config] → [設定 phpList] をクリック。
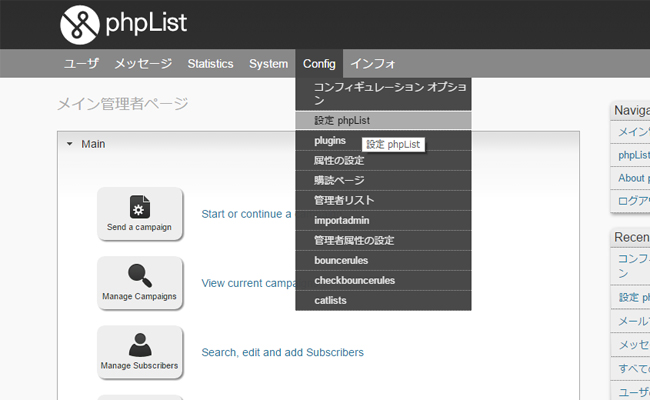
campaign settings内の Default footer for sending a campaign を編集します。
キャンペーンという呼び方にも慣れておきましょう。
phpListでは、送信するメッセージのことをキャンペーンと呼称しています。
なお、デフォルトのままだと大抵は迷惑メールとして処理されます。
また、購読解除用のリンクは必ず設置するようにして下さい。
リンク先は[UNSUBSCRIBEURL]になります。
例:
[text]購読解除は<a href="[UNSUBSCRIBEURL]">こちら</a>よりお願い致します。[/text]
メール送信テスト
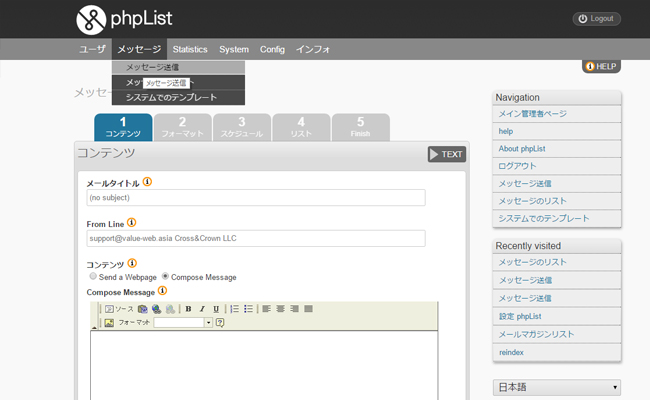
メニューの、[メッセージ] → [メッセージ送信] をクリックします。
メールタイトルを入力し、Compose Message 内に本文を記入します。
入力後、ページ下部よりテストメール送信先のメールアドレスを入力します。
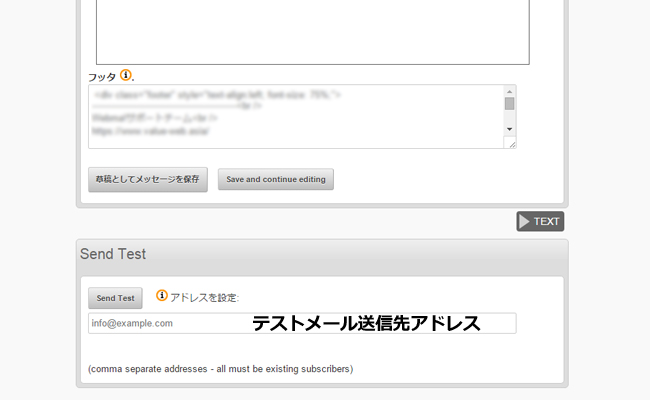
[Send Test] ボタンを押してみましょう。
また怒られる
怒られました。
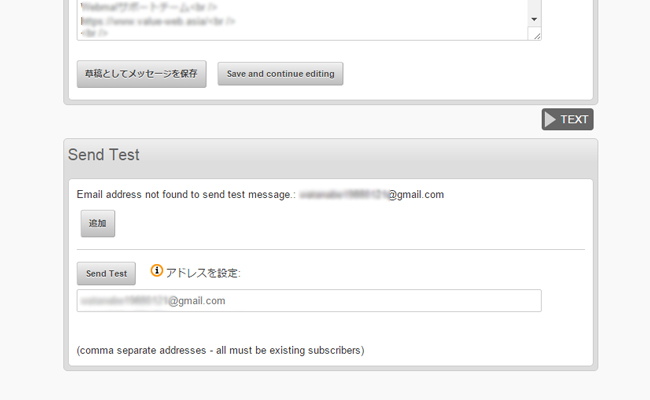
phpListは、メールアドレスリストにないアドレスにはテストメールも送れません。
ここは黙って[追加] ボタンを押してリストに加え、再度[Send Test] ボタンを押してみましょう。
これで入力したメールアドレスに配信されているはずです。
ひょっとすると迷惑メールフォルダに入っているかもしれませんので、そちらも確認してみて下さい。
次回はさらに設定を詰めてみましょう。